Saturday, April 30, 2011

Chipboard Window Box Card

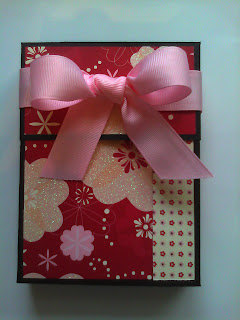
Earlier this week I shared with you that you can use chipboard that you find around the house in your paper crafting.  I used the front and side panels of a pasta box to make the front of this card.  I chose to use chipboard covered in pattern paper rather than cardstock because I wanted it to be very sturdy.  I want the recepient to be able to display the card without worries of it falling over.

 Here is a look at the card laying flat on my scrap table.  I used a post it note to cover the cello panel in the box to make a centered, square window.  I used a ruler and an exacto knife to cut out the window (you could use Nesties if you have the size you're looking for.).
 Here it is open and standing.

 I heat embossed the flower and then ran it through an embossing folder for texture
 Here is another view into the "window"
 
Thanks for looking!  I'll share other uses for your chipboard in upcoming posts.

Thursday, April 28, 2011

Cheap and Thrifty Scrapbooking Tips: Chipboard

Chipboard is one of my favorite tools in scrapping and paper crafting.  I use it to make embellishments, notebook holders, post-it note holders, boxes, and so much more.  It can be expensive to buy, but I've found sources for chipboard in varying  thinckness around my home and in my everyday life. 

Here is a perfect example, We separate our "recycling" from our garbage anyway, so why not recycle it within our own home and let me make something pretty with it?  I have a basket in my scrapbook room where I keep all the broken down boxes from our recycling.  This weekend I'll show you something neat that I have in the works for the pasta box featured above.

Make sure you stop back to see the unveiling!

Wednesday, April 27, 2011

Birthday Quilt Card

Today's post is using a stamp set from Stampin Up called Because I Care, and the sentiment is from All Ocassion.  I used my favorite pattern paper and 1" square punches for the quilted background, and then I ran the background through an embossing folder for the textured look.

 I kept it simple and just added pearl accents as the embellishments.
I hope you like it, and thanks for looking!

Tuesday, April 26, 2011

Thank You Cards--More Embedded Embossing

Yesterday I showed you come birthday cards I made using the embedded embossing technique of applying all the circle punches to the background and then using an embossing folder running it through a die cut machine.  Well, I'm completely addicted to the look!  I needed three thank you cards to give with the boxes and 6-packs that I made for my employees and my paying gig, and so I decided to layer circles on circles.  I really like the circles on black because the "pop", but the white stamping didn't hold up to the embossing very well...I'll have to try something to perfect the technique, but this is what I have for you today.

 Green Galore, Whisper White and Basic Black
 Pacific Point, Whisper White, and Basic Black
Melon Mambo, Whisper White, and Basic Black

Thanks for looking and Happy Stamping!

Monday, April 25, 2011

Embedded Embossing Stamping Technique: Circles--Round and Round

I just listed these adorable cards in my Etsy Shop.  I'm so happy with the way they turned out.  I punched and assembled each of the backgrounds and then ran them through my Cuttlebug with an embossing folder.  The photos don't do the colors justice.  They are vibrant and would be great for any age birthday recipent.
 Here is one with a black background and larger circles.

 This one is on white with much smaller circles
 Here is a close up of the texture on the black card.
Another close up of the texture on the white card.

Thanks for stopping by and taking a look.  I appreciate your comments.

Sunday, April 24, 2011

6-Pack Boxed Cards for Gifts Completed!

For those of you who have been following my 6-packs for my employees at my paying job, I've finished the third and final 6-pack, and I'm going to share that with you today.  Here are the links to A2 Box 6 Pack # 1 and A2 Box 6-Pack # 2 as well as the tutorial for the box.

This 6-pack uses Brocade Blue, Very Vanilla, and Kraft cardstock, and two pattern papers by Terri Conrad Designs and Wendster's Pages.  They are from the Coco Collection; the darker one is called Chocolate Souffle, and the lighter one is called Cream Puff.  I used a variety of stamps for the sentiments, but the images are from the Portfolio Collection.  All images are from Stampin Up.

 Here is the whole set
 The box closed up nice and neat
 Card 1:  Happy Birthday
 Card 2:  Happy Birthday
 Card 3:  Thank you
 Card 4:  For You
 Card 5:  Best Wishes
Card 6:  Thinking of You
One more final look at the 6-pack.

Thanks for looking and your comments!  Happy Stamping!

Happy Easter All

Hello everyone.  Just a  quick note wishing you all a Happy Easter today.  We've spent the weekend with loved ones and are very grateful for this time and the season.  I'll post something crafty later today, but until then, I'm wishing you happiness and special memories with your loved ones today.

God Bless,
Christine

Thursday, April 21, 2011

Cheap rrrr a Thrifty Thursday Scrabooking Tips--Cheap Dimensionals/Pop Dots

I love a lot of dimension in my paper crafting, so I use a TON of pop-dots and dimensionals to obtain the look I want since they come in so many different thinknesses and shapes.

One way that I can save money and get just the right size "pop-dot" that I'm looking for is to use the left over foam from my stamps. I alreay know that one side has a super strong adhesive on it so half the work is already done.
I peel the rubber off the left over foam.
Cut to desired size and peel the backing off
Place as desired.
Apply extra adhesive
not much is needed as it already has some "stick" since the rubber was stuck to it
and viola! cheap, customized pop dot.


Tip, if I'm looking for the thickness of the Stampin Up dimentionals since they are thinner that most of the other pop-dots, I just press on the item I've pop dotted until I get the thickness desired.

Thanks for stopping by. If you have any tips you use, please share them with me via a comment!

Wednesday, April 20, 2011

Tutorial: A2 Box Used in 6-Pack Sets

As I shared in earlier posts (A2 Box 6 Pack # 1 and A2 Box 6-Pack # 2) I'm making gifts for three of the ladies at my paying job for Administrative Professional's Day next week.  They are each getting a 6-pack of cards in their own box.  I've been getting requests for instructions for the box, so I thought I'd share the tutorial with you all today.

Here is a look at the third and final box.  I'll finish the cards for the box later this week.  Now we'll go through the steps to making this cute box.


 First gather your supplies.
  1. cutter with scoring blade
  2. cardstock A for bottom of box measuring 6x12"
  3. cardstock B for top of box measuring 6x6"   (tip, this can me the same or a coordinating color to A)
  4. Sticky Strip or strong adhesive
  5. ribbon, acessories, and embellishments desired
  6. Pattern paper A for the bottom of the box--2 pieces measuring 5 1/4x 4 1/4 and 2 pieces measuring 5 1/4 x 3/4"
  7. Pattern paper B for the top of the box--2 pieces measuring 2 1/4x 4 1/4" and 2 pieces measuring 2 1/4 x 3/4" (again, this can be the same or coordinating to pattern A--I typically use papers that will be used on the cards that will go inside the box.

Steps 1&2 

 Now the instructions (See Image A for template):
  1. starting the the bottom of your box (6x12 piece) score on the 12 inch side at 5 1/2" from each side (Score one side then flip the paper over and score the other side--you'll have parrallel lines)
  2. on the short side of the piece, score at 3/4" from each side (score one side then flip over the paper and score the other side)

Steps 3 & 4

 3.  On the lid piece, score at 2 1/2" on two parrallel sides (Score one side then flip the paper over and score the other side)
4.  On the opposite two side, score at 3/4"

Step 5

5.  Now you will cut the two center tabs to the scoreline on both the top and bottom pieces of the box

Step 5

6.  Apply your front and back patter paper (Hint, the bottom of each piece
should be closest to the inch strip as shown in photo below). 

 7.  Apply sticky strip as shown in photo to left


Step 8


8.  Assemble box being sure to put the tabs to the inside of the box prior to securing sides.


 Step 9:  Adhere side panel pattern papers to bottom and top portions of box and adhere ribbon and embellishments as desired
 
Here is one final look at my finished box.  I hope you have fun with this!  Please share your creations with me, and if you have any questions, please let me know!


You may find the template (Image A) below helpful for visualizing the steps in one place. 

Happy Stamping and thanks for stopping by!  Your thoughts and comments are appreciated.  Be sure to click on "follow" my blog to be aware of new posts!


Tuesday, April 19, 2011

A2 Card Box: 6-pack Number 2

On Saturday, I shared with you that I'm making gift boxes of cards for my employees at my paying job. You can see the first 6-pack of card here. This is the second set. The first one was masculine, and this one is very girly. I used Sending Love DSP from Stampin Up as well as Real Red, Kraft, Black and Verry Vanilla cardstock. All the stamped images and senitiments are also by Stampin Up.

Here is the box all closed up with it's pretty bow.

Here is a look at the 6-pack and the box with the lid off. Card 1: Congratulations
Card 2: you're too kind

Card 3: happy birthday

Card 4: thanks to you

Card 5: For You

Card 6: Wherever you go, go with all your heart

And one more look at the whole package.

Stop back tomorrow for the tutorial on how to make this box.
Happy Stamping!