Showing posts with label Scrapbook. Show all posts

Sunday, November 18, 2012

Bath Time Scrapbook 12 x 12 Layout

Today I'm sharing one of the scrapbook layouts I recently made.  This one is for a boy or girl and is titled Bath Time.
 
 Here is page one.  I used my Cricut to cut out the tub, bubbles, duck and title and then chalked and assembled the cute little bear.
 
 Page two.  Again, I used the Cricut for the title and the duck.
 
 I added glitter to the bubbles and I'm happy with the way the tub bear turned out.


Saturday, November 10, 2012

Because I Care Black and Ivory Elegant Greeting Card

Hello everyone!  I've been gone for a while as I was at a nice scrapbook/crafting retreat and then promptly got sick upon returning home.  I haven't posted any of the neat projects I worked on while I was gone, but I'm going to remedy that today.
 
My lovely neighbor is in a craft fair at church next weekend, so I focused on getting some items made for her booth while I was away.  I also have a friend coming over tomorrow to make more items for the sale.  I'm going to show you one of my cards.  I was able to borrow a nestibilities lace border oval from one of the lovely ladies at the scrap retreat, Mary.  Her cards are GORGEOUS!!!!!  She does wonderful hand water coloring and I learned a lot from her! 
 
Here is one of the cards I'll share today.


Thanks for looking and stop by soon for some of the projects I made, including 3 boxed 6-packs of cards an 2 scrapbook page sets!
 

Wednesday, December 7, 2011

Got Tools? Scrapbook Embellishment Title Tag

Today I'm sharing with you a project that I made for My Scrap Chick using one of their print and cut files.  I simply printed the images on my computer to the size I wanted and cut them out.


Thanks for looking

Sunday, July 3, 2011

Single 12x12 Scrapbook Page: Lovely Lavendar

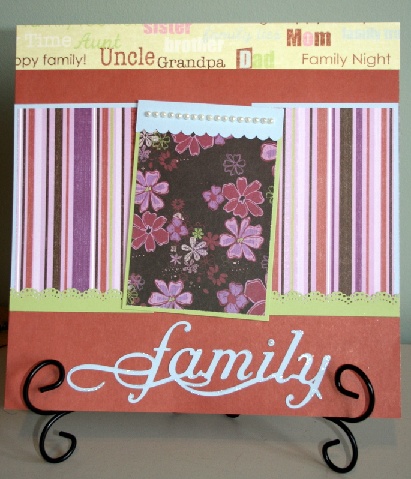
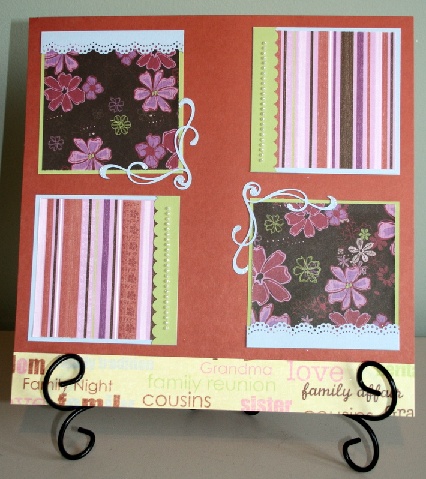
I decided it's been way too long since I've made a scrapbook page, so today you get a simple single page.  I used the Vintage Wallpaper embossing folder from Stampin Up! for the texture on the mats.
 I've had the floral and the striped paper for a number of years and never used them.  Today was their day.
 Here is a close up of one of the mats.  It's Perfect Plum
 This mat is in Very Vanilla
 The flowers are from Oriental Trading Company--I've had these for years as well.
The border punch I used for the strip in the center is new to me.  That means that his layout works for the Something Old, Something New challenge over at SCS.

Thanks for looking!  

Sunday, April 3, 2011

Tutorial: Notebook Holder


Thanks for stopping by today. I'm going to show you how to make a notepad holder for a 5 x 8 note pad. These make wonderful little gifts.


With the help of a friend, I was able to actually video tape today's turtorial. I'll type out the instructions for those of you who may not be able to view the videos.


Here is a list of the supplies that you'll need:


*a piece of chipboard measuring 8 1/2 x 11"


*cardstock measuring 4 1/2 x 11" (Dusty Durango used in sample)


*pattern paper measuring 4 1/4 x 11"


*a piece of coordinating cardstock measuring 1 x 8 1/2" (Chocolate Chip used in sample--I also realized that on the video I said 1 x 11"--OOPS!)


*24 " of coordinating ribbon (Chocolate Chip 5/8" satin ribbon used in the sample)


*Cutter with scoring blade or Bone folder


*5 x 8 notepad


*embellishments


*stamps


*pop dots


Instructions:


  1. Taking your piece of chipboard, place it on your cutter so that the 11 inch side is horizontal. Score it at 5 1/4"


  2. Take it out of your cutter and flip is around so that the end that was furtherest to your left is now on your right and score again at 5 1/4"


  3. Repeat the first two steps with the cardstock and the pattern paper


  4. apply your cardstock and pattern paper to the chipboard


  5. attach your ribbon in the center where your two papers meet, making sure the same amout of ribbon overlaps on each side for easier tying later


  6. apply you border if your papers leave any exposed chipboard on the edge


  7. apply your stamped image and sentiment and any embellishments you choose to add to the front.


  8. open the book and using a strong adhesive, glue your notebook into the right-hand side of the book


  9. tie your book closed and your done!


Here is the video tutorial if you'd like to watch


Thanks for stopping by! Let me know what you think of the tutorial!

Thursday, March 31, 2011

Thrifty Thursday: Handmade Scrapbook Accents

I've shared with you that one of the ways I save money and make my scrapbook and paper crafting dollar stretch is to make my accents/embellishments myself. This also allows me to personalize the accents to fit the photos and memories.


The scrapbook layout photos below show you a few of my handmade elements including the painted title, and the paper pieced "track" at the bottom of the second page.


Because the paper had a bit of shadow in the background, this called "distress" to me, so I tore paper, inked, chalked, and sanded the title and second embellishment.

I used, vellum, more ink, tearing, and pewter eyelets to carry through my distressed/worn look for these pages.
Here is a close up of the title. I used Making Memories paint and foam alphabet stamps, and then I played will the alignment of the letters. Once I stamped the title, I tore the edges of the paper with the use of a ruler to make them more straight...typically I don't use the ruler as I'm usually going to the more random look.


Once I was finished and I had the look I was going for, I joined the title together with a pewter eyelet.


For this embellishment I took scraps from the photo mats I had cut and then cut the remainder into strips and then placed them in succession of color starting with the darkest blue and then working my way down and repeating.

I tore the vellum to continue my worn look and placed it in the center of my element to allow the same amount of the strips to show above and below the vellum.

For the cost of 3 eyelets, and scraps of paper that I was using for the photo mats, I was able to accent and embellish my layout. I certainly could have been more elaborate in my accents, but I was able to still draw attention to the photos and scrap on a budget!

Thursday, March 24, 2011

Thirfty Thursday--Paper Piecing

This Little Piggy

I've talked before about making your own embellishments to customize your cards or scrapbook projects, but another reason for making your own customized embellishments is to save money and make your paper crafting / scrapbooking budget last longer or to allocate it to your "must have" items. A few embellishments that I regularly make myself are paper piecings. With scrap / leftover pieces of paper, markers, chalk, and adhesive, you can make the most adorable accents that finish your projects perfectly. One example is this cute little pig. I made him for a "Down on the Farm" layout, and it was my favorite element of the layout with the exception of the photos.


I used pop dots, chalk, and markers to add more detail and dimension to my little piggy.

One of the nice things about paper piecing is that if you can find patterns EVERYWHERE! I started by searching through coloring books, and found that tracing paper was a great way to make a template. You can certainly find patterns for free online, or there are different vendors who sell their patters for your use. There are also many die cut machines and software that will me a single dimensional paper piecing die cut that may also serve your need very well.

I like chunky, dimensional looks, so I curled this little piggy's tail by winding the piece of paper around a marker.


I'm determined note to let my paper crafting addiction hurt my family budget, so this is just one way that I can save my money for my "must have" list.

Wednesday, July 21, 2010

Card Organizer


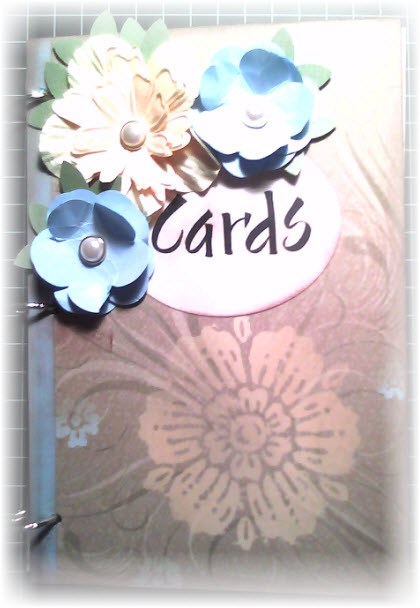
I've been working on a card organizer that utilizes 6 x 9" envelopes and chipboard. I finished this late last night, so the picture are only of the front, but I hope to get you better photos of it tonight. There is an envelope for each month that is decorated on the front and back, but the back is a list of lines so that you can make note of the dates you need to send a card for that month. I'll be listing it over on eBay or Etsy, but I haven't gotten that far yet. :0)

Here is a sample of the monthly envelopes inside the album. I tried to use some techniques that are out of my norm. I used lots of stamping and distressing.


I'll try to get more pictures ready for later today.

If you're intersted in knowing how I made this, please let me know.


Wednesday, July 14, 2010

Let the Pictures Tell the Story

It's been a while since I posted pictures of any of my personal scrapbook pages. I typically show you what is going up for sale, but today's post are pages for my own album.
These are photos from a day spent at the Conservatory with my niece, great niece and great nephew (I know! At 35 who would think I'm a great aunt already! Well I am phenomenal :0) but...). We had a wonderful day and I had my husband's macro lens and 35 mm Cannon.
So, here are the layouts.
I used the positive and negative of a chipboard letter "h" and painted them to match the flowers in the photos. I used eyelet metal letter, and triple matted my favorite photos in the bunch.


I didn't journal and I didn't use additional embellishments because I wanted the photos to do the talking for me. The pages are actually some of my favorite, but I wish these photos of them had turned out better so you could see the detail in the flowers.

Thursday, July 8, 2010

Thrifty Thursday--Organizing Your Supplies


Hello All! Today's tips are about how to organize your supplies without breaking the bank. Think outside the box when it comes to organizational tools. For example, one of my favorite storage tools is re-purposed Tupperware. The spice carousel works great for embellishments. I keep my frequently used embellishments in these for easy access; brads, flowers, photo anchors, cutting blade refills, buttons, charms, etc. each have their own compartment. I also use the small "Midgets" for tiny things like specialized brads or buttons by theme. The nice thing for me is that I use more of the Tupperware that I had without having to purchase anything. Lots of people sell Tupperware for very little at garage and yard sales. Generally the smaller containers are what you need, and they are even cheaper.


I also utilize plastic mesh baskets in various sizes to organize different items too. I keep my Stampin Up! ribbons and accessories separated from my other items by utilizing these baskets and they are also very inexpensive. A 3-pack of baskets is less than $1 at many discount chains or dollar stores.


Plastic shoe boxes are also another great organizing tool that are very inexpensive. I keep all my Cuttlebug embossing folders and Sizzix dies in these to keep everything together and organized. I use them to also keep themes of embellishments together; Summer, birthday, Easter, Christmas, etc. can be kept in a shoe box and then when I'm working on that theme, I pull out the appropriate shoe box and have all my embellishments handy. I also keep all the flowers, chipboard shapes, and unopened ribbon spools in separate shoe boxes on the shelves in my closet.

There are cheap ways to organize your scrap paper too. I have mine sorted in three bins made by Iris that are often on sale at Michael's craft stores for less that $5.00 each.

I like them because the have a secure closure, and they stack nicely together with grooved bottoms and raised lids that help stabalize them. The three that I utilize for my scrap paper are used--> one for scraps of cardstock, one for scraps of pattern paper, and one for Stampin Up scraps. I pick up new ones as needed and use these not only for scraps of paper but also completed pages that are either waiting to go in my own personal scrapbooks or are waiting to be sold. I have one bin for "in progress" projects to keep all the pieces together. You'll see these on the closet shelves of the post regarding my new scrapbook room.

Do you have any suggestions to share?

Monday, June 14, 2010

Paper Bag Albums--Homemade Gifts


Some special young ladies graduated this year from high school. I've known them since they were six years old, and I decided to make a special gift for their graduation. I made them each a paper bag album for them to take with them to college. The compact 6x6 size works well with dorm room life, and will allow them to bring photos of people they love with them into the beginning of their new worlds.

Paper bag albums are not new creations in my scrapbook room, they are one of my favorite homemade gifts. I make them in a variety of sizes, but the 6x6 is still my favorite.


Here are Eeva and Anna's albums.


The Front of Anna's Album


The Back of Anna's Album

The Front of Eeva's Album


The Back of Eeva's Album


I love giving these homemade albums as a special personalized gift. I just made one from my cousin with her first baby, and I have seven more baby albums to make! Three girls and four boys. I need to get three of the boy albums completed by next Tuesday. With that said, I'd better go to my scrapbook room and get working on them. :0)


Happy Scrapping!

Monday, August 31, 2009

Monday Already?


I can't believe that it is Monday already! I'm lookingforward to an extra day off work this week...I took Friday for a vacation day, and I'm hoping to get a lot done. I've been getting a lot of things started, but not a lot completed. I have to finish my card exchange item for Stamper's 12 on Thursday. I'm hosting, and the theme is Halloween or Fall. I'm making little Halloween treat holders. I'll be sure to post a photo when completed. I'm getting ready to list a family layout and we'll see how it does on eBay. Here is a picture.


Friday, August 28, 2009

Thrift Thursday---Recycle

Sorry all, I'm a day late getting this posted. I've been feeling a little under the weather this week and work has been insane, so I've not had time to play as I'd like to in my room. This week our Thrify Thursday (okay Friday) will be about how to scrap what you may have around the house without realizing it... I've shared with you how to make albums from lunch bags, but we stop there? Lets think differently...I'm not sure about all of you, but I'm constantly looking for new things to scrap. I LOVE chipboard and you can find it sooooooooooooooooo many places. I've used envelopes to create a pocket hold for stationery. I'm working on a project (ok I have been since January) that uses 6x9" envelopes to create a monthly card sorter. On the front side is the month and the back side is lined paper for you to keep track of who to send a card to for what reason that month...March 3 anniversary, April 27 Birthday, etc... I'll show you when mine is completed. I want to have it finished this weekend. I got hung up no August. See how easily distracted I am?? Where was I? Yes, what other things around the house can you scrap? How about coffee can? Make season centerpieces from them that hold napkins, silverware, flowers...


My friend Kristi over at ourscrapbookmemories.blogspot.com made a mini album out of paper towel/toilet paper rolls. How cute? Here is Kristi's. Click the link below the picture to get to her blog and find out more!


http://ourscrapbookmemories.blogspot.com/2009_04_01_archive.html


The possibilties are endless!


  • coffee filters

  • coffee can

  • envelopes

  • paper bags

  • chipboard

  • toilet paper/paper towel rolls

  • canning jars (decorate the tops and use to sort your embellishments)

  • shoe boxes (make ribbon holders)


I'll post come photos of my envelope card organizer when I'm finished with it as well as whatever else I'm able to come up with over the weekend. Please send me your ideas for thinking outside the box and reduce, reuses, recycle in your scrapping!

Saturday, August 22, 2009

Show Me Saturday

Hello All!

Given the economy many of us understand the trend for giving handmade items as gifts. I personally have always been a fan of making gifts for people because of the personal connection. I spend hours and lots of care and attention to make whatever item I choose to give. It's from my heart.


There are many paper crafts that you can make and give, but it can sometimes be overwhelming to know where to start. Today we'll focus on a paper bag album. Lunch bags turned beautiful. I love giving paper back albums because the base of the book is inexpensive, but I can turn it into a irreplaceable keep sake.


Here are the instructions that I use. This site also has other mini album ideas and instructions. Check out the calendar!


Here are some samples of paper bag albums. This one as you can see was title, "A Mother's Love" and was donated to a charity auction.


Front Cover


One of the pages--this one actually lifts up for photo or journal spot


The removable tags--tucked into the pockets


Side view


Show my what your albums look like! I'd love to see what you create!