Showing posts with label altered items. Show all posts

Tuesday, September 25, 2012

Butterfly Paint Chip Greeting Cards


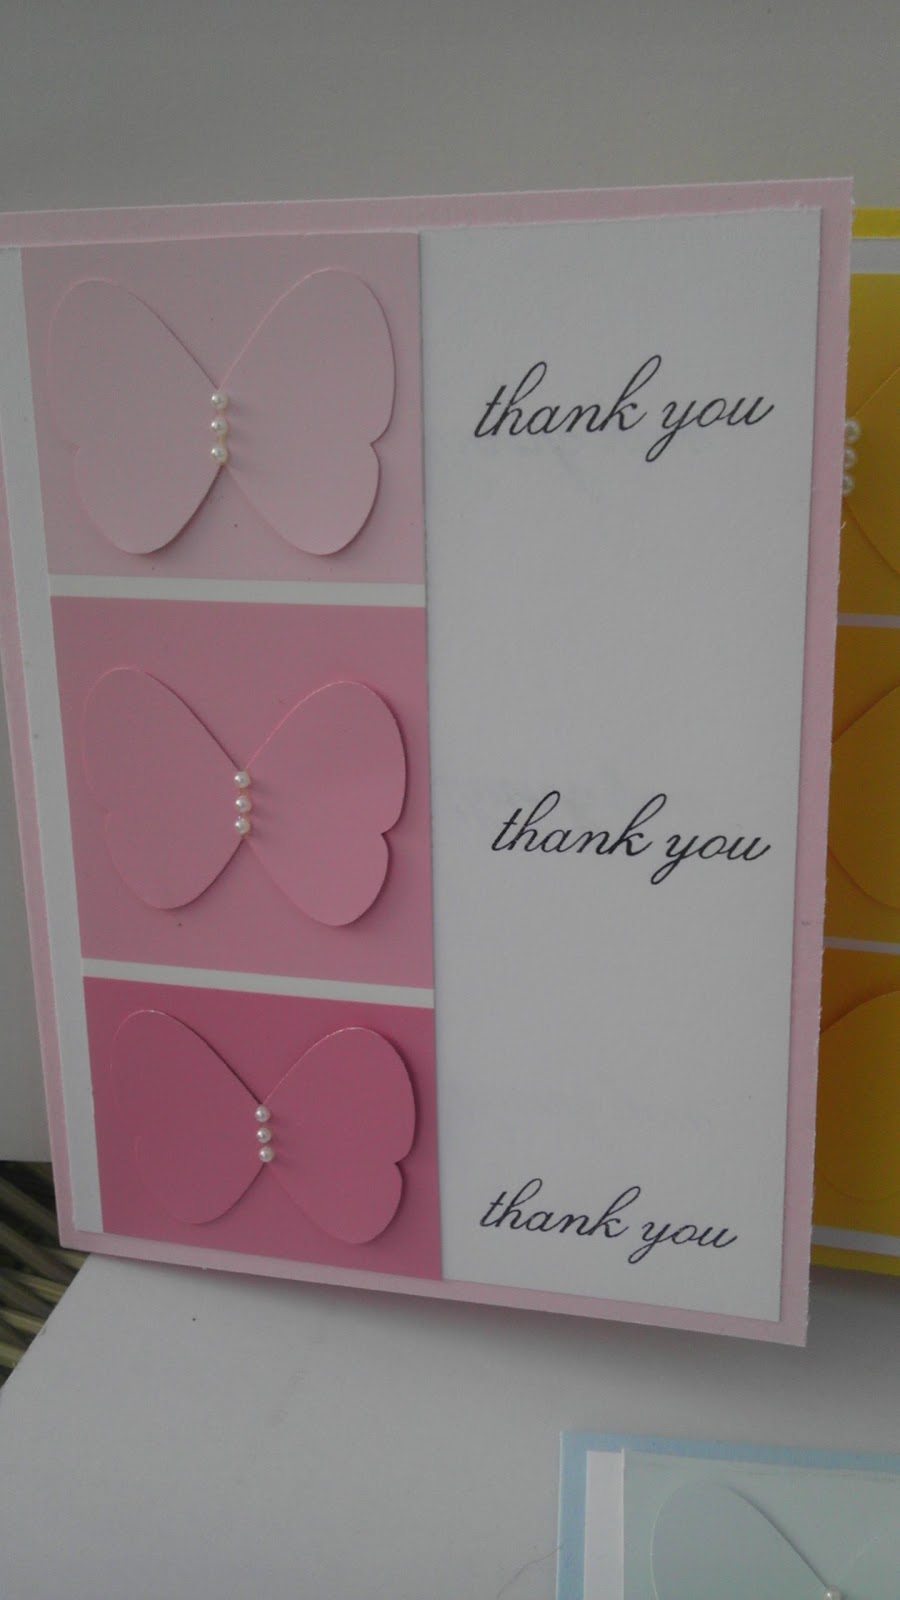
Hello everyone!  Today I'm sharing with you my new fast and favorite cards.  I recycled paint chip samples that didn't make it to my house walls, and I used them to make some simple thank you cards.
 

Here is the set of four I made.  I used card bases of Pink Pirouette, YoYo Yellow, Bashful Blue, and Green Galore. 
 
 
I punched a butterfly shape out of each color on the swatch and accented them with pearl flatbacks
 
 
I used the thank you stamp from Because I Care and stamped thank you along side each butterfly


What do you think?

Thanks for looking and happy stamping!


Sunday, February 5, 2012

Stampin Up Embrace Life Envelope Pocket Flower and Butterfly Card

Hello All!  I  know that I've been away.  My husband's family is slowly working through the grieving process.  His sister is staying with us and his brother will be her on Wednesday to stay until he is also on his feet.  They have come together as a family to support each other during this time, so I ask for continued prayers for healing of their hearts, peace, and strength.

I've been doing some crafting with my sister-in-law and I'm happy to say that I have successfully crocheted a scarf, and two kitchen towels!  YAY!  I have also been playing in my paper room, and my friend Norma has been bringing me some COOL ideas!  Today's is the first I'll show you of the items Norma has shown me how to make.

 Forgive the photos, but the colors are Pretty In Pink, and Whisper White, with Pretty in Pink pattern paper as well.  This is a photo of the card with the pull-put section tucked inside.
 Here is what the card looks like when you pull our the center portion.  The card is made using an envelope and then a piece of cardstock as the pull out section.
 Here is a close up of the texture from the embosslit dies of the butterflies.  I used the stamp set Embrace Live, and used Pretty in Pink ink.
 Here is a close up of the flower...you get a little better idea of how dimensional this really is.
One more look at the final card.  Thanks for looking and sticking with me during the past few months!  God Bless!

Oh!  And a peek at the kitchen towels.  I made a pair of these.

Tuesday, December 6, 2011

Cricut Ornament Shaped Greeting Card

I was playing with my Cricut cartridges to make some embellishments and decided that I wanted to make a shaped card.  I used my Joy of the Season cartridge and cut the ornament foundation at 6". 
 This card suits for two of the challenges over at SplitcoastStampers as well:  TLC354 (Christmas or Winter button art), and CAS147 (Twine).

 I used strips of DSP that I can't remember the name of, and I used the stamp set Riveting, and is stamped in Baja Breeze.

 Then I used the buttons to separate the layers of paper, and twine around the top and through the center for a hanger.

 This angel shows a bit better, but the tree in the center of my stamped image is raised on a pop-dot.

Here is one final look at the card.

Thanks for looking!

Monday, December 5, 2011

Punch Art Stocking Stuffer Kingsize Candy Wrapper

So today's project is my first attempt at using a technique I found on SplitcoastStampers called Tag Punch Star.  I didn't have both tag punches, so I wasn't able to make a star, but I have a variety of square punches, so I tried the 3/4 and 1 inch punches to make the "snowflake" on this project.

 These photos are HORRIBLE, but they will have to do. 
This is a king size Kit Kat candybar wrapper!


The big squares are punched in vellum and layered behind the white which I applied glitter to.
I stamped the greeting from Heard From the Heart
The brad is from my stash.
 Here is a close up of the glittered center.

 and the tasty treat tucked inside.

Thanks for looking!

Saturday, December 3, 2011

Card Pouch Greeting Card Gift Set

My post today is a bit late, but I hope you will find it worth the wait.  I made a card pouch of  4 x 4" cards.  I used one of the wonderful tutorials over at SplitcoastStampers.

 Here is the front of the pouch stamped with the flourish from Bliss, and I used Eggplant Envy ink.  The white background is embossed with the Square Lattice folder from Stampin Up!

 I used sheer white ribbon with wire sides to tie the pouch closed.

 Here is a look of the cards all tucked away in their pockets.  There are four 4 x 4 inside the pouch with envelopes.  There are two in each pocket.  The each have a different theme but a similar design.

 Here is one look at the cards that are tucked away in the pouch.  I used one stamp from Perfect Punches, and three from Whimsical Words.  The sentiments are:  You're never more than a thought away, Happiness Always, You're too Kind, and Happy Birthday.

 I used circle punches from 5/8" to 1" in the dark purple and the pattern paper and then adhered them to white squares and embossed the pieces in the Square Lattice embossing folder to match the pattern on the front.

Here is one more look at the pouch.  Thanks for looking!

Saturday, September 17, 2011

Butterfly Punch Pansy Tutorial

I hinted earlier about what my post later today was going to be.  I've watched a ton of tutorials on this process, but I didn't have the right reinkers or the aqua pen as needed per the tutorials I watched, so I improvised.

The supplies I used for this project are:
  • 3 butterfly punches per completed pansy (in Whisper White)
  • Water spritz bottle
  • Cotton Swabs (instead of Aqua Painter)
  • Elegant Eggplant and Daffodil Delight stamp pads
  • Yellow brads
  • Punch or paper piercer
  • Heat gun (optional)


 I laid out all my punches on a paper towel.
 Then I spritzed them with water.  Not so they were dripping, but damp.
 Start by pushing the center of the butterfly into the yellow with the pad of your finger or with the cotton swap.
 Dip the cotton swab into water and then brush over the yellow to let it bleed into the paper. (Key is that you want a large area of yellow to start with as it will become hidden once you add the purple).
 Here is the punch after brushing with water.
 Here is the whole set of them after I was done with the yellow.
Now move onto the purple with the outer edges of the butterflies. If needed, re-spritz with water to keep them damp.
 Here are the punches after the purple was applied.
 Either wait for the punches to dry naturally or if you're like me, heat them until all dry.  Then lay three butterflies on top of each other and punch in the center to place brad.
 Here is a side angle of punching.
 Set brad in center and then turn butterflies to form flower petals.
 An now you have unique handmade flowers for your projects.
Here are the completed three pansies.  I'll show you the project I use them on tomorrow.  Stay tuned!

Tuesday, August 23, 2011

Wedding Shower Gift: Recipe Box

I've been a bit slow at posting as I'm trying to get everything ready for my sister's wedding shower this Saturday.  We had a shower hosted by my aunts for the family this past weekend, and today I'm going to share with you the recipe box I made. 

I followed the great tutorial over at Just Give Me Stamps.


Thanks for stopping by!

Thursday, June 9, 2011

Greeting Card Organizer

Almost a year ago, I shared with you just a few photos of my handmade card organizer.  I never got you more photos, or got it listed to sell (oops!), so...time to fix that.  I got the photos taken and I got the organizer listed over at my Etsy Store.  Here is the link directly to the organizer, and here is the link to my store.  Most of what I make and share with you on my blog goes into my store for sale.

OK.  Here are the photos:


I really liked the final outcome and I spent a lot of hours on this organizer.  My goal was to stamp, and have focal points other than pattern papers.  I think I accomplished that.  I used chipboard for the front and back covers, and I used a lot of different brands of items for this project, and I am looking forward to making another one this summer to match a 2012 calendar that I'm working on.

Be sure to check back for those posts!