Sunday, July 11, 2010

Sunday Challenge Card


I decided to make my first card based on a sketch challenge over at Sketch Saturday. If you've never checked them out before they have great sketches to help with your creative juices. My photos aren't the best because I'm still using my cell phone to take them. I have to get the camera back from my hubby. When we moved it ended up in his room, and he's not letting go :)


So, here is my card for the challenge.


I used wanted a vintage, shabby look, and I didn't have the lacy trim in the ivory color, so I ended up distressing the white I had with the ink that I used on the papers. I stamped, water colored and used Stickels on the butterflies. I used vintage looking pearl brads to hold the sentiment to the background.

We're having a housewarming party today so I don't know if I'll get any tutorials posted today. I'm also still sorting through all my supplies and hope to have the Blog Candy ready to go this coming week.
Thanks for stopping by! Happy Crafting!

Saturday, July 10, 2010

Show Me Saturday--Flap Card Tutorial

Today's post is a really simple tutorial for this flap card. This is just a really simple sample, and you can make these in any size, or style and you can obviously make them more elaborate than this sample. I made this one this morning in about 10 minutes (including snapping the photos).


Supplies:
  • Cardstock 4 x 12" (to make a larger card, increase the width of your cardstock)
  • pattern paper--2 pieces 3 3/4" square
  • stamp set desired
  • button or other closure (larger brads work great)
  • bone folder
  • circle template
  • embellishments desired
  • glue dots & other adhesives

Instructions:

  • Score your cardstock on the 12" side at 4 and 8 " and fold for crisp lines
  • Use a circle to form the shape of your flap. (I used the bottom of my chalk container)

  • Cut the rounded edge of your paper (this will be the front of your card)
  • Using the same circle template, cut your pattern paper for the flap and adhere both pieces of patter paper to the front of your card. As well as the inside center panel.
  • Next, using a glue dot, place the button on the front so that the flap can slip under it but do not place the button on top of the flap so that it seals.
  • Decorate the front of the card as desired
  • And there you have it!

Like I said, this is a very simple card, but sometimes that's what we need. Thanks for stopping by, and please share with me what your flap cards look like.

Friday, July 9, 2010

Formula Friday #1 Easel Card


Today I'll share with you my first easel card. I've seen many of these cards, but never attempted making them before. This was my first project in my new stamping/scrapping room. Most of the easel cards that I've seen use brads, or bulky flowers or popped pieces as the "stopper" for the card to stand. This card simply uses a few extra layers of paper. The overall finished card size is A2, (4 1/4 x 5 1/2"). Here is the recipe for my card. (I used all Stampin Up! papers and stamps).

Supplies:
  • cardstock for base and layers + stamped image cardstock (I used Whisper White, Melon Mambo, Crushed Curry, & Rich Razzleberry)
  • pattern paper (I used Razzleberry Lemonade DSP)
  • coordinating ribbon (I used Pumpkin Pie 1/4" grosgrain)
  • edge punches (I used Eyelet Border)
  • desired embellishments (I used the retired 3 flower punch from Stampin Up! and flat backed pearl minis--not from Stampin Up!)
  • desired stamps and stamp pads (Stamps are from Elements of Style and Delight in Life, Stamp pads used: Color Box Yellow Citrus, VersaColor Opera Pink, and Stampin Up! Basic Black and the distressing along the edge of the stamped image was VersaColor Brown).

Instructions:

  1. Cut an 8 1/2 x 11" piece of cardstock into two 4 1/4 x 11" ( I used Melon Mambo)
  2. Cut one of the pieces from step one in half (4 1/4 to 5 1/2") and set aside--this will become the front of your card
  3. Fold the remaining piece from step one in half to make a 4 1/4 x 5 1/2 card with the fold on the top
  4. Fold the front piece in half (fold the bottom of the front towards the top fold). This is the piece to which you will adhere the piece from step 2
  5. Lay the folded piece of cardstock with the longest side down on the table, and the fold of the "Short" side pointing towards you.
  6. Place adhesive on this "Short" folded side of paper
  7. Place the top of cardstock from step 2 on top of the adhesive
  8. Decorate the front and inside of your card as desired.
  9. Place "Stopper" where you want your card to stand--I used three layers of cardstock stacked. You can choose to use anything you'd like that will lift off the base enough to "Catch" the bottom of the card front.
Variations:
You can make these cards any size that you like. Just remember to fold the base in half and you're only limited by your imagination.

There is a great tutorial also available on SplitCoastStampers (SCS) with a video to watch. http://www.splitcoaststampers.com/resources/tutorials/easelcard/


Show me what you come up with and let me know if you have questions!

Thursday, July 8, 2010

Thrifty Thursday--Organizing Your Supplies


Hello All! Today's tips are about how to organize your supplies without breaking the bank. Think outside the box when it comes to organizational tools. For example, one of my favorite storage tools is re-purposed Tupperware. The spice carousel works great for embellishments. I keep my frequently used embellishments in these for easy access; brads, flowers, photo anchors, cutting blade refills, buttons, charms, etc. each have their own compartment. I also use the small "Midgets" for tiny things like specialized brads or buttons by theme. The nice thing for me is that I use more of the Tupperware that I had without having to purchase anything. Lots of people sell Tupperware for very little at garage and yard sales. Generally the smaller containers are what you need, and they are even cheaper.


I also utilize plastic mesh baskets in various sizes to organize different items too. I keep my Stampin Up! ribbons and accessories separated from my other items by utilizing these baskets and they are also very inexpensive. A 3-pack of baskets is less than $1 at many discount chains or dollar stores.


Plastic shoe boxes are also another great organizing tool that are very inexpensive. I keep all my Cuttlebug embossing folders and Sizzix dies in these to keep everything together and organized. I use them to also keep themes of embellishments together; Summer, birthday, Easter, Christmas, etc. can be kept in a shoe box and then when I'm working on that theme, I pull out the appropriate shoe box and have all my embellishments handy. I also keep all the flowers, chipboard shapes, and unopened ribbon spools in separate shoe boxes on the shelves in my closet.

There are cheap ways to organize your scrap paper too. I have mine sorted in three bins made by Iris that are often on sale at Michael's craft stores for less that $5.00 each.

I like them because the have a secure closure, and they stack nicely together with grooved bottoms and raised lids that help stabalize them. The three that I utilize for my scrap paper are used--> one for scraps of cardstock, one for scraps of pattern paper, and one for Stampin Up scraps. I pick up new ones as needed and use these not only for scraps of paper but also completed pages that are either waiting to go in my own personal scrapbooks or are waiting to be sold. I have one bin for "in progress" projects to keep all the pieces together. You'll see these on the closet shelves of the post regarding my new scrapbook room.

Do you have any suggestions to share?

Wednesday, July 7, 2010

New Scrapbook Room

Well, I was able to snap some quick pictures with my cell phone to at least share a little of what my new scrapbooking/stamping space is like for anyone interested. I haven't gotten creative juices flowing to make anything yet, but I'm excited to get started and will certainly be stamping tonight once I'm done posting this message.
Here the room view from the hallway. There are double doors into the room. You can see that Cocoa is clearly comfortable in my new space!
This is the view to the immediate left upon entering the room. Cricut, Sewing Machine and Computer.

This is the first side of the closet moving left to right in the room.

This is the second side of the closet. I love all the varied shelving! It keeps everything easy access.


This is the view of my actual desk.


If anyone has any suggestions on how to better utlize the space (without a lot of cost) I'm open to suggestions!
Thanks for stopping by and happy crafting!

Unpacking

Well, I got all my scrap/stamping supplies unpacked and the room is ready to go! I will take pictures tonight and either post tonight or tomorrow depending on when our internet connection is stable (This is another story all by itself!).


While unpacking, I realized that I have way TOO much! I know, you are all shocked by that! My husband's response to that realization was "Duh". We had a good laugh!


In order to ensure that I use teh stamps and supplies that I have I'll be weeding through everything and creating my first ever BLOG CANDY! I'll include paper, stamps, embellishments, and more! Everything except the stamps will be brand new. Some of the stamps may be as well, but most of them will be previously loved. I'll be certain to start another post with the title BLOG CANDY. I have to figure out how to link to the random number generator and figure that all out as well as how much shipping will cost. So stay tuned for more information and fun candy!

Tuesday, June 29, 2010

Moved

Hello All!

Well, we moved over the weekend. It was a LOT of work. I'm excited about my new scrapbook room and am slowly working on getting everything just where I want it. I picked up 5 matching Ikea tables at a garage sale and they look so nice! I had multiple workspaces in my room before, but none of them matched. I haven't decided what color to paint the walls, and right now most of my supplies are still in boxes on the awesome shelving that my hubby installed in the closet. I will post photos once I get everything where I want it and functional again--I'm hoping over this long holiday weekend I'll tackle that project. The rest of the house is mostly unpacked thanks to some wonderful friends! We're excited and it's starting to feel like "home" the dogs seem to be adjusting well.


Back to it! I hope to post more by next week. Stay tuned :0)

Monday, June 14, 2010

Paper Bag Albums--Homemade Gifts


Some special young ladies graduated this year from high school. I've known them since they were six years old, and I decided to make a special gift for their graduation. I made them each a paper bag album for them to take with them to college. The compact 6x6 size works well with dorm room life, and will allow them to bring photos of people they love with them into the beginning of their new worlds.

Paper bag albums are not new creations in my scrapbook room, they are one of my favorite homemade gifts. I make them in a variety of sizes, but the 6x6 is still my favorite.


Here are Eeva and Anna's albums.


The Front of Anna's Album


The Back of Anna's Album

The Front of Eeva's Album


The Back of Eeva's Album


I love giving these homemade albums as a special personalized gift. I just made one from my cousin with her first baby, and I have seven more baby albums to make! Three girls and four boys. I need to get three of the boy albums completed by next Tuesday. With that said, I'd better go to my scrapbook room and get working on them. :0)


Happy Scrapping!

Thursday, June 10, 2010

Thrifty Thursday: Tips--Punches

Hi All!

I realized that I got ahead of myself and posted the Thursday post on Wednesday so this is fixing that! Thanks for stopping by! HAPPY CRAFTING!

Today’s tips are regarding those expensive punches that I’m sure a lot of you have. Do you ever get frustrated because they don’t cut as smoothly as you like, leaving a rough paper edge? Do they stick when you push the lever down and trap your paper in the blades? I know how frustrating that is, but I’ve found some tips that work to remedy these issues most of the time.
Tips:

  • Sometimes it’s worth paying higher quality punches. You can still do this on a budget. JoAnn’s Crafts, and Michael’s, are the main craft store chains by me and they regularly have punches 40-50% off or have coupons for 50% of one regular price item, so you can get a great quality punch for a very reasonable price. You can look on eBay, at garage/estate sales, on Craig’s List, and many other places to get a deal.
  • Wherever you get the punch, the first thing I suggest is working the punch on some scrap paper to test it. If it’s new, it helps remove the films that can be left on the blades from the manufacturing, helps you see how it works, and determine if you need to do anything before using it on your projects.
  • If your paper isn’t looking smooth when it comes out of your punch you can try a few things to sharpen the punch and to help it slide through the paper more easily. o Take a sheet of heavy duty tin foil and use it as if it were the paper you were punching. Punch a few times and if it doesn’t seem to be helping, fold the foil in half and continue punching. o
  • Once you’re done punching foil, the blades are sharpened and you can punch through wax paper to “coat” the blade so that it moves through the paper more smoothly.
  • If the punch is still sticking (trapping the paper) try using a very small amount of WD-40 spray. Make sure if you do this that you punch on scratch paper until all residue is gone.
    If these tips don’t help your punches work more smoothly, it might be time to consider acquiring a new one—you may have just loved it to death.

Tuesday, June 8, 2010

Two Challenge Tuesday #5

Well, it's that time of week again. Time for our Two Challenge Tuesday. Two challenges, one final product. I've been working on finishing graduation and baby gifts (paper bag albums--I know you're all just shocked!), so I haven't been creating many cards at home lately. Today's sample card is a result of the stamping club workshop that I go to each month. I wasn't able to attend this week, but they made this adorable card at last week's session.


Challenge 1: Make a masculine card.

Challenge 2: The main image of the card has to be made of paper, not stamped.


Sample: This card is made using punches! Do you see it? Wide oval, large oval, 1/2 " circle, Modern label, word window, and horizontal slot punches from Stampin' Up!


Here is the sample!


Let me know what you come up with for the challenge! Happy Stamping!

Sunday, May 23, 2010

I'm Back

It's been a long time, but I stopped by to say hello. We're moving, and I won't have a ton of time between now and next month to update here, but I'll start sharing tips and tricks again soon. Thank you for your messages and for checking in when you have. I appreciate it!

Tuesday, September 1, 2009

Two Challenge Tuesday # 4

Hello all, it's already that time of week! Two Challenge Tuesday. I've borrowed the sketch for this weeks challenge from Split Coast Stampers. You can find the post at the link below.


We're going to combine the shape challenge with a color challenge. Here we go.


Here is the Sketch piece of the challenge (Thanks SplitCoastStampers!)


And here is the color piece of the challenge. I thought these were great colors given that summer seems to be quickly fading away. It's been cold here in Minnesota, so I'm trying to warm things up! :)


This is my really quick take on this sketch and color scheme (I literally made this card in 5 minutes). Time was not on my side to get this one done last night. SORRY!


Monday, August 31, 2009

Monday Already?


I can't believe that it is Monday already! I'm lookingforward to an extra day off work this week...I took Friday for a vacation day, and I'm hoping to get a lot done. I've been getting a lot of things started, but not a lot completed. I have to finish my card exchange item for Stamper's 12 on Thursday. I'm hosting, and the theme is Halloween or Fall. I'm making little Halloween treat holders. I'll be sure to post a photo when completed. I'm getting ready to list a family layout and we'll see how it does on eBay. Here is a picture.


Friday, August 28, 2009

Thrift Thursday---Recycle

Sorry all, I'm a day late getting this posted. I've been feeling a little under the weather this week and work has been insane, so I've not had time to play as I'd like to in my room. This week our Thrify Thursday (okay Friday) will be about how to scrap what you may have around the house without realizing it... I've shared with you how to make albums from lunch bags, but we stop there? Lets think differently...I'm not sure about all of you, but I'm constantly looking for new things to scrap. I LOVE chipboard and you can find it sooooooooooooooooo many places. I've used envelopes to create a pocket hold for stationery. I'm working on a project (ok I have been since January) that uses 6x9" envelopes to create a monthly card sorter. On the front side is the month and the back side is lined paper for you to keep track of who to send a card to for what reason that month...March 3 anniversary, April 27 Birthday, etc... I'll show you when mine is completed. I want to have it finished this weekend. I got hung up no August. See how easily distracted I am?? Where was I? Yes, what other things around the house can you scrap? How about coffee can? Make season centerpieces from them that hold napkins, silverware, flowers...


My friend Kristi over at ourscrapbookmemories.blogspot.com made a mini album out of paper towel/toilet paper rolls. How cute? Here is Kristi's. Click the link below the picture to get to her blog and find out more!


http://ourscrapbookmemories.blogspot.com/2009_04_01_archive.html


The possibilties are endless!


  • coffee filters

  • coffee can

  • envelopes

  • paper bags

  • chipboard

  • toilet paper/paper towel rolls

  • canning jars (decorate the tops and use to sort your embellishments)

  • shoe boxes (make ribbon holders)


I'll post come photos of my envelope card organizer when I'm finished with it as well as whatever else I'm able to come up with over the weekend. Please send me your ideas for thinking outside the box and reduce, reuses, recycle in your scrapping!

Tuesday, August 25, 2009

Two Challenge Tuesday # 3


Hello everyone! It's that time again. Time to see what I've come up with for the Two Challenge Tuesday... This week the challenges will be a mix and match. You can choose two of the following 4 suggestions. I've used all 4 in my sample (I felt like being an over achiever for once :0)--that was my attempt at humor and if you needed to read this line to get that I failed miserably!)


1. Two-Step or Mask Stamping: In sample this is the rose and the sentiment stamped on top of each other.


2. Texture: I embossed the background blue and pierced the edge of the white layer with the rose


3. Use of supplied sketch: My interpretation of the sketch


4. Color challenge: Use black and white


Show me what you've come up with the challenge this week...are you an over achiever too?


Saturday, August 22, 2009

Show Me Saturday

Hello All!

Given the economy many of us understand the trend for giving handmade items as gifts. I personally have always been a fan of making gifts for people because of the personal connection. I spend hours and lots of care and attention to make whatever item I choose to give. It's from my heart.


There are many paper crafts that you can make and give, but it can sometimes be overwhelming to know where to start. Today we'll focus on a paper bag album. Lunch bags turned beautiful. I love giving paper back albums because the base of the book is inexpensive, but I can turn it into a irreplaceable keep sake.


Here are the instructions that I use. This site also has other mini album ideas and instructions. Check out the calendar!


Here are some samples of paper bag albums. This one as you can see was title, "A Mother's Love" and was donated to a charity auction.


Front Cover


One of the pages--this one actually lifts up for photo or journal spot


The removable tags--tucked into the pockets


Side view


Show my what your albums look like! I'd love to see what you create!

Thursday, August 20, 2009

Thrifty Thursday--Distress for Less

Today I'm going to share a tip that I use to try and save money in my paper crafting addiction. I try not to buy specialized items that are only for one purpose, but I love the looks of some of the products and tools so I try to balance getting the look without spending the money. I'm going to share a Thrifty tip with you and I hope that you'll do the same! I love to make my dollar stretch so please share your money saving tips here too.


I love the look of distressing, but I don't want to buy more specialized products for one technique...My solution? Use what I have in unique ways. I have MANY pairs of scissors, and they each get used for something else: I have one pair for ribbon, one for paper, one for adhesive, and one for paper distressing. The one I use for paper distressing is a fairly small pair, the whole scissors is about 6 inches long and the blades are about 3 inches long. I open the scissors completely and hold the paper tight in my left hand while I scrape the scissors along the paper with my right hand. This gives a wonderfully distressed look. Rather than buying expensive distressing inks, I usually use brown chalk. The key to chalk is to seal it so that it doesn't smear and wipe off. I use a VERY LIGHT layer of hair spray to set the chalks. Here is a sample of both techniques on a card I made quite a few months ago.


Tuesday, August 18, 2009

Two Challenge Tuesday #2

Here is your second challenge. This time I'm not giving you a sketch or a color scheme. Your challenge is to us watercolors, and use a unique shape. Here is my card. The image was water colored with water color pencils and then distressed and I used some Rangers Stickles to add some pizzaz. The unique shape is that this particular card is a gift card holder.


Sunday, August 16, 2009

eBay-SMIC August Challenge

So my talented friends at SMIC, the design group on eBay, have an August challenge. We were all challenged to create a school layout using yellow or something in three's. As you can see from the pictures below, I've chosen a lot of yellow!
I'm actually really happy with the way these pages came out, but I wish the camera would have cooperated a little more. The pictures don't do the colors justice. I did lots of special details on these. The bus took me almost 3 hours to make! I hand drew it, sanded, chalked, and assembled. I also made is a secert journal/photo holder. If you lift the tires you'll find another space for memories.
Make sure to search my listings on eBay to be able to purchase this layout, and make sure to search SMIC for all the other creative productions of my talented friends!


Two pages together


Page One

Page Two


Backpack Bear


School Bus

Friday, August 14, 2009

Two Challenge Tuesday #1--Color and Sketch Results


Here is my card for this callenge. I used Stampin Up, Penny Black, and Cuttlebug product to create this card. Let me see what you come up with!

Wednesday, August 12, 2009

Two Challege Tuesday's

This idea came to me last night and I got REALLY excited. I'll post a dual challenge on Tuesday's with my sample for that challenge and then each of you can share your take on the challenge. For example, it may be a color and sketch challege, or a technique and product challenge. My mind is swimming with possibilities and I'm excited to hear what you think!

Sunday, May 24, 2009

Memorial Day Weekend

Well all, as usual, my everyday life has taken over my time. I got back from Tennessee, and head right for a wonderful retreat. Now I've been back to "real" life since last Tuesday, and the chaos has jumped into full swing!

Yesterday we planted some fruit and veggie plants to grow in pots on our patio. We'll see how they do and if it was worth the work and expense to grow our own :)

I'm working on the MAY Challenge for my eBay scrapbook group SMIC. Out theme this month is "Memories" or "in Memory of"... I need to get my items made and listed so that they end by 5/31. Does anyone have a suggestion for a theme for our June challenge?

I apologize that I haven't put pictures in the last two posts. I'll work on that for the next one!

Monday, May 4, 2009

Decisions, Decisions...

Well, my evening was certainly eventful. I'm preparing to leave town to Tennessee, and I needed to get my cards completed for a card swap that will happen while I'm gone. The theme was Masculine for this month. I struggled with what stamps, papers, colors...alright, I struggled with the whole thing :)


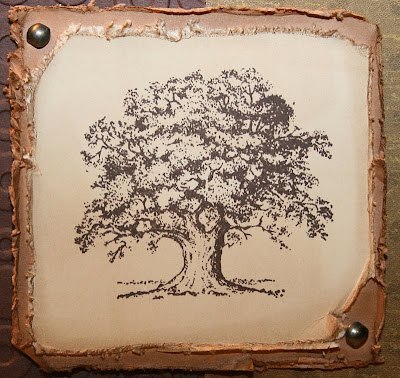
I ended up using the Lovely As a Tree Stamp set from Stampin Up, and I chose the oak tree. I chose the color Night of Navy for the base, Mellow Moss, Brocade Blue, and Whisper White for the card stock layers and two pattern papers by Chatterbox. Below are the instructions for the card.


  • Cut the Night of Navy card stock to 3.5 x 8.5 and score at 4.25 (this is the base for the card).


  • Stamp the image onto a 2.5 x 2.5 piece of Whisper White card stock and tear the top of the paper all the way across


  • Layer with a piece of Mellow Moss car stock cut to 2.75 x 2.75


  • Layer with a piece of Brocade Blue card stock cut to 3 x 3


  • Fasten Snap or brad in the left top corner of the layered image


  • Adhere layers of pattern paper overlapping to leave a .25 border around the edge of the front of the card.


  • Adhere stamped layers with pop dots to the right side of the card front


  • Cut and adhere a 3.25 x 4 piece of Whisper White card stock for the inside of the card

I didn't get a picture of the finished card, and I apologize. If someone follows the directions, please send me a picture of your finished card.


I know, not an elaborate card, but it was 9:30 pm when I started them and I have a ton of things to finish up before we leave. I'll make it up to the ladies next month! That's all I've got for you today. My next post will most likely be once we return from Tennessee. Thanks for stopping by!