Thursday, January 22, 2009

Valentine's Day Piecings, Layouts and Albums

Well, I have to admit that I'm not a big celebrator of Valentine's day, and I was trying to figure out why. Then it dawned on me that I should be. It is usually the one day a year that we tell everyone how much we love them. Here are some of my latest love filled, love themed items. We don't' have to have everything in reds, pinks, and fru fru--now don't take that wrong, I love fru fru too, but not all the time, and I'm not a red and pink person for more than a few times. Here are a few different takes on "love" themed items. How do you say "I love you"?

Love you to the Moon

Slider box to fill with candy


6x6 paper bag album


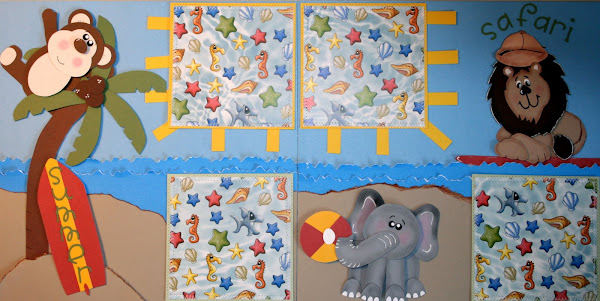
Wild Thing I Love You page starter set.


Love Bug page borders
My point is that your options for showing someone that you love them in your crafting are unlimited. Let your imagination run wild! Drop me a line and let me know how you're showing your love in your paper crafting for Valentine's day or just because. HAPPY SCRAPPING!

Saturday, January 17, 2009

Refelction Image Stamping Technique

Hello everyone. Here are a few recent cards I made using this technique. The first one I made with wet craft ink stamped onto a glossy cardstock and transferred the image that way. The second one I used a new technique which was really slick! Here are the cards, and look below for the instructions. HAPPY STAMPING!


Ok. Now you try it! I'd love for you to send me some of your creations with this technique. Send me a pic and I'll post it for others to view.

Supplies:

  • Desired Stamp
  • Piece of Cardstock large enough to accommodate 2 images of selected stamp
  • Ink pad
  • Ziploc baggie (large enough to accommodate 1 image of selected stamp)

Instructions:

  1. Stamp image onto upper section of cardstock (ensure that you are leaving enough room to stamp the image a second time)
  2. Stamp the same image onto the Ziploc bag (I usually make sure the bag is closed so it’s a little sturdier—the freezer bags work really well).
  3. Make sure you hold the bag securely so that it doesn’t slip as you stamp—you may consider taping it to your work surface with masking tape.
  4. Turn the bag upside down to line the image you just stamped onto the baggie underneath your cardstock image
  5. Press the image onto your cardstock being careful not to slide the bag over the paper.
  6. Remove bag and viola, reflection image!

Friday, January 2, 2009

Happy New Year

Happy New Year everyone!

I hope that you had safe and wonderful holidays. The ladies in my eBay scrapbook group SMIC started the year off with a Valentine theme layout challenge. I tried to make something different, and the photo below is the final product.


Did you make any New Years Resolutions? I did. Here they are for everyone to see.
  1. Lose weight
  2. Scrap more and try new techniques and styles than I usually do (I know I can't be the only person that tends to use the same layout all the time!)
  3. Organize my scrapbook room so I actually use all the stuff I already have.
To go along with resolution number 3 here are some pictures of my scrapbook/craft room. We'll see where the new year takes me!


Do you have any suggestions for me for organizing my craft room? I welcome any comments!
Talk to you later!

Monday, December 22, 2008

Are You Ready?

I don't know about all of you, but I can't believe Christmas is in 3 days! I am no where near ready! I don't even have a tree up yet! We've been getting a ton of snow here in Minnesota, so it has already begun to look a lot like Christmas, but something is keeping me from being in the mood. Perhaps it is the economy. When I think of how many people are out of work and won't have much to celebrate it makes me sad.

Please don't get me wrong, I know that Christmas isn't about gifts, but for people with children that can't afford to get things for their children, it is sad. Unfortunately, I am not in the position to donate as we have in years past.

Things have been very slow for sales, and I haven't been creating things for the past few weeks. I have some time off from my full time job over the next few weeks, and I hope to get lots of scrapping and paper creating done.

Here are a few of my latest albums.


Saturday, December 6, 2008

Chipboard Calendar

Hello everyone! I hope you all had a wonderful Thanksgiving!

Well, today is Saturday and it snowed here last night. I just love the shimmery sparkle of the fresh white snow. It makes me remember my childhood playing outside and building snowmen and forts.

I can't believe it's already December. It started thinking about how quickly the holidays will be over and the new year will arrive. I created a chipboard desk calendar for 2009. Here are some pictures of it. It was really easy. I'll post the instructions below so that you can make your own!


Supplies Needed:
  • 8 pieces of of chipboard measuring 8 1/2 x 5 1/2 (half of a 8 1/2 x 11 sheet)
  • crop-a-dile or hole puncher strong enough to go through chipboard
  • 2 binder rings (I suggest 1-1 1/2 inch)
  • coordinating papers and embellishments
  • tacky glue such as tombow or fabric tac
  • brayer or folding bone for smoothing paper on wet adhesive
  • months printed out on cardstock--I found mine on about.com
Instructions:

  • Cover all chipboard with coordinating papers (you will have 2 covers and one for each month). Please note that I built my calendar so that months were back to back. For example, January was on one side and February was on the reverse side.

  • Once you've applied your pattern paper roll chipboard with brayer to allow adhesive to be spread evenly.

  • Once all your pattern paper is adhered and dry punch each chipboard piece with the crop-a-dile the same distance from each side. I used my first piece as the template for all the other pieces to make sure they lined up properly.

  • Once all your pages have been punched continue decorating and embellishing as desired.

  • Secure pages with binder rings and enjoy!

Saturday, November 22, 2008

Saturday 11/22/2008

Happy Saturday all! It is snowing a bit here in Minnesota. I think that is a great excuse for me to play in my craft room. Today marks the end of my charity auction on eBay in memory of Kathy (sweetpeascraps) who lost her battle with cancer in August.

THANKSGIVING
It is so hard to believe that Thanksgiving is next week already! Time certainly flies once Halloween comes, but each year seems to be faster and faster. I'm not sure if any of you have heard, but Michaels is going to be open on Thanksgiving day from 6-9pm (not in all states) and they are having an amazing sale on Cricut cartridges. The will be $29.00! Considering they usually sell between $50-90, that is AWESOME. They will also have the Cricut Create (their new machine with the portability of the orginal and the functionality of the Expression) half price. For Minnesota, that will put the price at around $150.00, so for those of you looking for a new machine, that might be the day to buy it!
Well, I'm off to scrap! Have a wonderful weekend!

Saturday, November 15, 2008

Newly Finished Items


Well everyone, I've been busy working in my scrap room again and I have some newly finished items I'd like to share with you.

This one is listed right now on eBay as a 100% Charity Auction in memory of sweetpeascraps (Kathy) who passed away recently after a brave battle with cancer. The proceeds are being donated to the American Cancer Society. Other sellers on eBay are also listing in Kathy's memory, and you can find the auctions this week (11/15) by searching sweetpea in the craft category.


Here is another layout that I finished that will be listed tomorrow (11/16) along with the Christmas Paper Bag. The colors are a little dull in the photo, but I really like the way this turned out. The background is a pale yellow, and the brown and blue actually look nice together in person.
I wish I could out the camera settings better. I feel like I'm always saying, "The pictures don't do this justice," but I"m saying it again! :) The pictures don't do this one justice. Be sure to check the eBay link below to look at my auctions!


Tuesday, November 11, 2008

Christmas Paper Bag Album


Hello everyone!
Well, this was certainly a busy weekend. I've been painstakingly working on a 8x8 Christmas paper bag album, and I finally finished it! I'll be listing it on eBay shortly, so be sure to take a look at my links below to find it!
Here is a photo of the front cover of the ablum.

Wednesday, November 5, 2008

Heat Embossing Video

Ok. So I couldn't figure out how to add the number of photos that I wanted to, but I created a short video of still photos that will hopefully work.
My finished card measures 3 1/2 x 4 1/4 inches. Here are the instructions:
  1. Base paper of card measures 8 1/2 x 3 1/2 inches. I folded the card in half with my bone folder. I selected coordinating patter paper measuring 3 x 4 inches.
  2. I stamped my image (angel) with a VersaMark ink pad (you can choose to use embossing ink or whatever ink you desire) onto a larger piece that I will trim down after embossing.
  3. I placed the stamped image in the embossing tray and poured embossing powder onto the image. I moved the paper around to ensure thick even coverage. I then tapped the back of the paper to remove any excess powder.
  4. I heated by embossing gun for approximately 10 seconds before moving the gun over the paper to melt the powder. It is important to continue to move the heat gun and keep it approximately 4 inches away from the paper so that you don't burn it.
  5. I trimmed the embossed paper to size and tied a shimmery ribbon at the bottom in a knot. I embellished the coordinating pattern paper 6 brads.
  6. I assembled the card and used pop dots to raise the embossed image.
  7. Done :0)

Friday, October 24, 2008

How to Heat Emboss Card--Part 1

Ok...so I'm having a few technical difficulties with video, so I'll do this in two parts. First post will be supplies needed. In part two (to be posted this weekend) I'll post photos of the steps.

Supplies Needed:

  1. stamp of choice
  2. cardstock (base for card, as well as separate piece for stamped image)
  3. coordinating pattern paper
  4. versamark stamppad
  5. embossing powder of your choice (I chose Stampendous--kaleidoscope)
  6. heat gun
  7. brads, ribbon, or other chosen embellishments

Stop back later this weekend for the photos and instructions!


Monday, October 20, 2008

Welcome 10/20/2008

Welcome to sistochris Scrapbooking and Paper Crafts! Thanks for stopping by. I was searching for a way to share my paper crafting with people that are interested, so I thought what better way that to start a blog about it! :)

I have been scrapbooking since 2000, and stamping and card making since 1995. I've been a crafter since I was a child. I grew up painting plaster items, cross-stitching, and making altered items. I'm married and have two dogs. I love paper crafting, but I make more than I could possibly use all by myself, so I sell my items on ebay under the Seller ID sistochris.